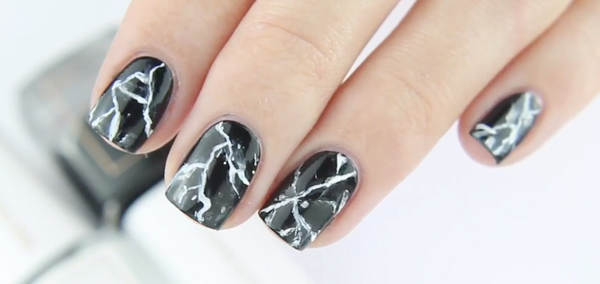
Black Marble Nail Art Tutorial by Kia-Charlotta
Posted by Jessie Goh on 10th Apr 2018
BLACK MARBLE NAIL ART TUTORIAL by Kia-Charlotta (reposted from Kia-Charlotta's Blog)
Step 1: Apply base coat on all your nails.
Step 2: Paint all your nails with a black nail polish (Brave Soul from Kia-Charlotta)
Step 3: Gently roll up a piece of aluminium foil as seen in the video above
Step 4: Mix a drop of white nail polish (Be Yourself from Kia-Charlotta) with a small drop of top coat.
Step 5: With the rolled up aluminium foil, gently press some of the white nail polish mixture on your finger as seen in the video above.
Step 6: With a thin brush, join the white stains you created on your finger with some of the white nail polish mixture as seen in the video above.
Step 7 (optional): Pour some nail polish remover into a small bowl. With a thin brush, gently apply some remover on the white nail polish lines and spots on your nail. This will help fade and spread the white nail polish to give it a more realistic marble effect.
Step 8: Repeat this on each nail.
 Australian Owned | Cruelty-Free Beauty, Where We Lead, We Don't Just Follow


